Attaching and Detaching Slicers
Once they have been created, you can attach slicers to (and detach them from) data within a Tabulation. This enables the data to be filtered to only show values relevant to the selected slicer.
For example, if we have a slicer called 'Date year', created from data representing Years from the selected model, then you can use this slicer to filter the displayed data by year.
Attaching a Slicer
You attach a slicer to displayed data as follows:
- Select the cells to which the slicer is to be attached. You can either select a single cell, or multiple cells.
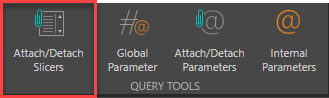
- Click Attach/Detach Slicers in the Query Tools section of the Advanced Setting ribbon:
- The Attach/Detach Slicers dialog is displayed:
- Click in the checkbox next to the slicer name.
- Click Apply. The selected slicer is attached to the selected cells and appears above the worksheet.

This dialog lists all the slicers that have been created for the Tabulation.
Detaching a Slicer
You detach a slicer from the displayed data as follows:
- Select the cells from which the slicer is to be detached.
- Click Attach/Detach Slicers in the Query Tools section of the Advanced Setting ribbon, as shown above.
- The Attach/Detach Slicers dialog is displayed:
- Click in the checkbox next to the slicer name to deselect it.
- Click Apply. The selected slicer is detached from the selected cells. It may still be displayed above the worksheet if it is attached to other cells.
Note: If the slicer is attached to multiple cells, you can choose to detach the slicer from all (or only some) of the cells by appropriate selections.
This dialog lists all the slicers that have been created for the Tabulation. The checkbox next to a slicer name indicates that it is attached to the selected cell(s).